Monday, August 27, 2012

Tacos al Pastor

Pork and pineapple tacos al pastor are gluten-free and simple enough for weekday fare. 
I never used to buy corn tortillas. I just didn't know how to make anything with them. My experience of so-called Mexican food was mostly of American fast food. When I moved to a new area and started seeing them in the supermarket, I didn't know what to make of a floppy corn tortilla. Aren't they supposed to be hard? Isn't that the difference between a flour tortilla and a corn one---soft vs. crunchy?

Tacos al pastor is sloppy, yet simple, fare for dinner
Only at the drive-thru, my friends. At the grocery store, corn tortillas come fresh. You can usually find them in the refrigerated case, or close by. They're paler than the yellow corn shells that come in taco kits at the supermarket. Look at the ingredients. You want a nixtimalized corn flour, and not too frightening a string of preservatives after that. A variety I can find locally, and which is made without preservatives, is Maria and Ricardo's. The ingredients are "ground corn treated with lime, water, and guar gum." The first ingredient, "ground corn treated with lime," is nixtimalized corn, which is what you want.

I like to get food inspirations from Cooks Illustrated, and then to pursue one of two ends: either to go back to the source and make the most authentic possible version of the dish described, as when I went back to the source, repeatedly, making cassoulet, or alternately, make the recipe even easier without losing too much of the quality. According to the author of a recipe for tacos al pastor I found in a recent issue, this is street food, and is typically grilled. Yet CI's tacos al pastor are a bit fussy for a sloppy crowd pleaser. I decided to dumb them down.
Braised, then broiled pork, tossed in the simmering sauce for serving as tacos al pastor

In simplifying tacos al pastor, I started my modifications at the cooking method. The "al pastor" in the name means, in the style of a shepherd. "Pastor" is "shepherd," like the pastor of a "flock" of church congregants. Why is it called that? Because when you get this in a real Mexican taqueria, it's cooked on an upright spit, a method borrowed from Arab-Mexican shepherds, and the same way lamb for gyros is cooked today in most restaurants.

Feel free to grill your pork for this recipe, but I find that, for my purposes, which is just to put a little color on some already braised pork and to warm up some fruit, I don't feel called to start a charcoal fire. I feel like braising on the stovetop or in the oven, or letting the crock pot do most of the work, and then finishing it off on the broiler.

Taco al pastor with a side of braised cabbage and carrots
Souza has you braise the meat on the stovetop, but you can also do this in a crock pot. He also makes quite the fetish of exactly what type and number of chiles to use, and again, I riff and take shortcuts, use what's on hand. My farm share has included a lot of fresh hot peppers of all varieties in the last few weeks: anaheims, jalapenos, serranos. I pureed the fresh peppers with tomatoes, garlic, and spices, added a drop of liquid smoke, and simmered sliced pork butt in it until it fell apart. Then I put the sliced meat and pineapple on a broiler and gave everything a few minutes, just to begin to brown, and served it on warm corn tortillas with garnishes of scallions, cilantro, and lime.

Spicy Pork Tacos (al Pastor) in Cooks' Illustrated (login required)

Wednesday, August 1, 2012

How to harvest the fruits of the field


Advice on picking beans, berries, tomatoes, and more this summer.

If you’ve got a you-pick as part of your farm share, or you’re planning to go to a commercial you-pick farm this season, you’ll want to be prepared to make the best of your time. Going out for the fun of berry picking or choosing a jack o’ lantern pumpkin is one thing, but if you’re out there to bring in a harvest of food for your pantry or freezer, you will want to make the most of your time.

Fruit or vegetable?
But what if I want vegetables? you ask right away, thinking of green beans, tomatoes. In fact, most you-pick fields are for fruit: tomatoes are a botanical fruit, not a vegetable, as are pumpkins, eggplants, peppers. Green beans are seed pods; not exactly fruit, but closer to the meaning of the word than vegetable, which is everything else: undifferentiated plant matter. When I think of harvesting a vegetable, I think of taking the whole plant, or at least the parts it’s using: leaves, stems.

It’s not that easy
My first job harvesting, I merely held the clipboard while my new boss, Terry, wielded the machete, decapitating cabbages neatly at ground level. I began to understand that harvesting is a skill, not something to stumble into and expect to be any good at.

The cabbage harvest came in January; it was in Florida, with growing seasons all year round. My next lessons in bringing in the crop would come with my mother-in-law, who took me with her to the strawberry you-pick fields. Here, I got lessons that could be more broadly applied.

Make hay while the sun shines
Make the time to pick when the picking is easy, or you will lose too much of your time to gleaning instead of getting a high return on your investment.

Bring containers
Bring containers to pick into that will protect easily bruised fruit. I bring stacks of plastic quart yogurt containers to pick berries and herbs into. Green beans are sturdy and can be picked into a cloth grocery sack. Tomatoes need sturdy-sided buckets to help prevent crushing.

Don’t be a redneck (unless you want to)
Wear a hat and clothing that will protect your neck from the sun. The term “redneck” comes from the burn a farmer gets across the back of his neck, working outside. If you pick shirtless, you may end up with your neck and shoulders blackened while your belly remains as pale as it started, because to pick, you must bend, kneel, squat, or otherwise get down as close as possible to plant level. Child labor begins to make sense, here.

Hide and seek
The fruits of most plants will hide under the leaves, if they can, to avoid burning in the sun. You can’t see the ripe fruit easily by standing over the rows and surveying the leaves. Your eyes will try to pick out the color of sweet berries, and will find only the sunburnt outermost leaves of plants, crisp against the sandy bed.

Push back the leaves so you can see the stems, and let your eyes adjust. It can take several seconds of focus on the inner parts of the plant before your brain can play the “Where’s Waldo?” game it was designed to play: find the food.

This focus is particularly important when the food isn’t bright red and round. Ripe green bean pods look very much like the stems of green bean plants. The critical eye you are developing in the field is for what the ripe fruit looks like, so it leaps to your eye.

Eat some
If it can be eaten raw, brush off any visible dirt and have a bite. It helps motivate you for the picking and processing, and if your body is pleased with the food, it may help you find it more easily while you’re out there in the field, picking.

Avoid waste
Don’t bother to pick the underripe, the overripe, the split and the damaged. Nothing gets bigger after it’s picked, and most fruit will not continue to ripen. Strawberries don’t ripen after you pick them; tomatoes, once they’ve reached mature green (a paler shade), tomatoes will ripen off the vine. Don’t pick more than you can clean and process before it begins to wilt. Don’t pick what you don’t like to eat.

Bottom up
Note where the ripe fruit is on the first plants, and continue to look in those places on subsequent plants. Tomatoes ripen in hands, or clusters, from the bottom to the top of the staked vine. Work your way methodically down the row, not skipping the first or last plants in the row, or those that have fallen over or been overtaken by weeds. In fact, gleaning after other you-pickers, who are inevitably amateurs, you find that these are precisely the places that the leery avoid. Some of the fattest berries are in the tall weeds on the edge of the patch.

Processing
When you get your haul home, clean and process it as quickly as possible. Enlist friends and family to help with the processing. It’s the most boring part, and the easiest for even the unskilled and uncoordinated to do.

Wash everything gently and thoroughly. Discard anything you’ve brought home that isn’t fit to eat. Remove tips and strings from green beans, hull berries, blanch and skin tomatoes … research the food you’re going to put up before you even set out, so you know what will be involved after you come home from the fields.

Clean up and plan something easy for dinner.

Rest.
You earned it.


Read more on "Getting the best from your farm share"

Wednesday, July 18, 2012

Kimchi Soup (Kimchi chigae)

Spicy Korean kimchi soup is just the thing for a hot, hot day.

Recently, I’m really into this spicy Korean soup of pork, tofu, and kimchi called kimchijigae, or kimchi chigae. I started ordering it from a Korean restaurant in Northampton, SooRa, and then I had it at Gohyang, the Korean restaurant in Hadley, the next town over, for comparison. I liked the SooRa experience more, possibly for sentimental reasons, because they were nice about how weird Kevin and I were the first time we went in there, on one of our post-bicycling food adventures, famished and just mowing through the banchan, pickles that accompany a traditional Korean meal, to the point of needing a whole round of seconds.

Kimchi chigae is principally flavored by kimchi and another traditional fermented ingredient, a savory fermented paste of soybeans, rice, chili peppers, and salt called kochujang. This is a flavor that was not familiar to me before I started eating more traditional East Asian foods, and one I would describe as almost yeasty. An ingredient that is commonly used instead of kochujang, doenjang, is another fermented bean paste with that same earthy, yeasty essence. On my second visit to SooRa, the restaurant that introduced me to kimchi chigae, I ordered a different soup, the doenjang chigae, which the waitress described as quintessential Korean dish, and it was sour and savory, without the brightness of kimchi.

Kimchi chigae is made very sour and spicy from the kimchi and a finely ground red pepper. The bulk of the soup is usually made with fresh cabbage as well as large amounts of fermented cabbage in the form of kimchi, and small amounts of pork and tofu. It’s eaten with rice and some sides of pickled vegetables. Each time Kevin and I made our way to a Korean restaurant, I sweated and slurped through my bowls of kimchi chigae and swore to learn how to make it myself.

I like to have food security, and one way I feel food secure is being able to make the foods that I really love to eat. I don’t like having to rely on someone else to provide a food I want. For a little while, I love the thrill of having favorite dishes that I can only get in certain restaurants, but pretty soon, I need to be able to replicate it at home. This is how my repertoire becomes peppered with recipes. For a while, I had access to a good Indian grocery and cookbooks, and learned to make several dishes, starting with what I loved to eat at my favorite Indian restaurant and then expanding into other dishes that used ingredients I wanted to cook. Now I can also make a handful of East Asian dishes, mostly what qualifies as “junk” or snack food, and so is familiar from restaurants: Pad Thai, phô. A copy of The Take-Out Menu Cookbook has made its way into my home, and while it does not include Korean, it is of an ambitious breadth, including such items as bagels from scratch and your own Thai curry pastes.

To learn how to make this new soup I was crazy about, I looked for recipes for kimchi chigae online, letting Google lead me to the proper name for “korean pork and tofu stew,” which I’d forgotten, finding several and amalgamating them to come to an idea of what a typical kimchi chigae consists of. When I wanted to learn to make phô, I did the same thing, studying different recipes until I had a platonic ideal of it in my head to riff off of. There’s no point in precision when it comes to dishes like this: every household will make it differently, and it’s made from living ingredients and leftovers, so it resists exact duplication. That’s the art part of cooking, separate from the science.

The one ingredient that has proven difficult to find is the kochujang. I’ve been scouring every store in bicycling range for this ingredient, and come up nearly empty-handed. Even Tran’s International Market, which seemingly has a whole aisle dedicated to bean pastes, did not have exactly what I was looking for. A national brand, Annie Chun’s, did not inspire, either, because like the only variety of kochujang that I did find at Tran’s, it contained wheat flour, making it unsuitable for my gluten-free husband. Also, because they were all shelf stable, I can only assume they were not living.

What I should have found was something like what I ended up substituting, which was miso. Every place I’ve shopped, looking for kochujang or doenjang and kimchi, have all had selections of misos in their refrigerated cases. We’ve been using some red miso plus a healthy shot of Sriracha sauce to get the kochujang effect in both the kimchi chigae I’ve been making about once a week for dinner, and in Kevin’s breakfast soup.

The other main flavoring in the soup is the kimchi, preferably kimchi that’s been sitting around in your fridge for a while, because it has more beneficial bacteria in it and a stronger flavor. Real kimchi is cultured, as are all traditionally made pickles. When shopping for kimchi, sauerkraut, or any kind of pickle, look for it in the refrigerated case. The ingredients should include only vegetables, salt, and water. There’s no vinegar in a real pickle.

A local company called Real Pickles in Greenfield, MA describes their traditional pickling processes on their website. They make an “Asian style cabbage” pickle available at River Valley Market. (The prices from their online store are comparatively high; it’s expensive to ship glass. Another reason to buy local.) It’s a more refined version of the kimchi I have eaten elsewhere, make of very coarsely chopped cabbage and streaky red with chili peppers. The Real Pickles variety of kimchi is fairly mild, light in color, contains leeks, ginger, and garlic as well as cabbage and peppers, and the pieces are more finely minced than other varieties of kimchi I’ve sampled. I prefer its flavor to several other varieties I've tried, though because it varies so much from the standard I've come to accept, it somehow doesn't seem as authentic. It's at least as authentic as last summer's moussaka: the real thing is always subject to change, including relocation.

Gohyang has an attached grocery store where they make their own kimchi. I’ve missed them being open before---I’ve stopped there a couple of times during the day, only to be reminded by their posted hours that they only do a dinner business. But there is another local flavor to add to my cooking pot when I get the chance.

Read more about living foods on my other food blog, Tin Foil Toque.


Photo credit: charlie applebottom/Flickr

Saturday, June 9, 2012

Braised pork foreleg and belly


We are eating the last bits of the half a pig we bought late last year. This week, I braised two forelegs and the last two pieces of pork belly that were in the freezer.

There are two challenges to working with this pig, both challenges that I relish. One is to use as much of the pig as possible, while minimizing the overwhelming porkiness. I put whole pig’s feet from this farmer into a pot of split peas, once, and ruined them, because these are not my father’s pig’s feet. I wrote a micro essay for Meatpaper in which I described the way my father would eat the pig’s feet that my mother would braise in tomato sauce. Even as a child, trying to eat one of those fatty trotters was a disappointment. There’s no meat on them, just bone and connective tissue, which are great for making silky, rich sauces, but on a pastured pig, there is also nothing porkier. The scent and flavor are strongly musky, almost human. And there lies the second challenge in working with this pig: being pasture raised, it ate a rich diet that makes it taste more like a pig than grain-fed pork raised in commercial operations, like what you buy in the supermarket and what my mother bought to put in her sauce.

My farmer tells me there are several factors that make a pig porkier tasting, including breed, diet, and exercise. This pig foraged in woods, ate bugs and roots, and had room to run around. The color of the animal’s skin is supposed to speak to the depth of flavor, too, with red pigs having redder, stronger-tasting flesh. Our pig has white skin, which I removed this time before cooking. I’ve braised some belly before with the skin on, and decided I could do with a milder flavor. Besides, I was also going to braise the forelegs, which I was sure would be stinky.


Previous experiments with this pig have proven that the best approach to the tough and flavorful bony cuts, like the ribs, has been to marinate the meat in a mojo criollo type of mixture (OJ, oil, and garlic is the barest-bones version of this), then rub it with dry spices, sear the ribs, then braise, finishing it with a barbecue sauce in the last hour or so of cooking. I’ve also had excellent results braising pork belly with strong spices and aromatics. The cooking is the same for the ribs as for the belly: sear, then braise. I decided to bring my simpler belly process to the forelegs, and braise everything together until the forelegs fell apart.


I worked from a recipe for Chinese Braised Pork Belly, made a couple substitutions (brown sugar for rock candy, jarred minced ginger for fresh), left out the eggs, and added water as necessary to braise. I have a giant, extremely heavy cast iron roasting pan that deserves some of the credit for the excellent results I get using it to roast vegetables and meat. The steady heat that it holds, and how hot the surfaces get, all do an amazing job. One of the disadvantages of cooking in a typical home kitchen like mine, compared to the kitchens in restaurants and on cooking shows, is that their stovetops and ovens can get much hotter than mine. Iron helps even the score.


To take the skin off, you want a very sharp knife. I sharpened my knife twice during this process, because taking off skin requires sharpness, and cutting through tendon and hitting bone will dull the blade considerably. After taking the skin and foot off one foreleg, I needed to sharpen up again for the next.

Taking the skins off the squares of belly is not unlike skinning a fish fillet or taking a chicken breast off the bone. I hacked the shit out of these bellies, like I did the first few times I filleted salmon. Not that anyone cared after it was cooked.

I cut a long incision in the skin, worked the knife under it, and kept the tension on the skin as I worked, in order to remove as little fat as possible, and no meat. 


To take the feet off, I cut through the skin around the foot at the "wrist," just above the thumb-looking toes. There are strong connective tissues on the front, rear, and sides of the joint, and running through the middle of the bones. After cutting through the outer connections with a knife and clearing the way between the bones, I used a pair of kitchen shears to cut the ligament in the middle.

After searing the meat in the roasting pan, I added the other ingredients from the recipe, including water, and began to braise at 250 for several hours, turning the pieces over every hour or so, to allow for browning above the liquid.


Each of these forelegs was good for more than one generous serving of meat. We ate the braised foreleg and belly together, which was a good combination because the fat content averaged out nicely between the fairly lean forelegs, which are a lot like turkey legs in the amount of connective tissue and the leanness of the meat, and the extremely fatty belly.


In the picture above, the sliced belly is between three and five o'clock, most of one foreleg is from five to nine, and along the top is the remnants of another foreleg after we'd already savaged it.


We ate from these for a few meals, eating bits of the foreleg and belly over lentils and rice. This morning we finished it off for breakfast with pancakes. It was so good that Kevin started singing “Pork and Pancakes” to the tune of the Hallelujah chorus in Handel’s Messiah.

Friday, May 25, 2012

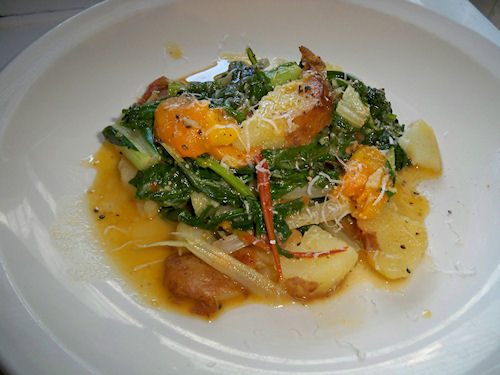
Recipe: Roman hash


The types of greens or potatoes you use in Roman Hash are up to you; you can even choose to fry the potatoes in bacon fat, or skip the cheese at the end. If you use both very hearty greens (such as collards) and very delicate greens (such as arugula), chop them into separate bowls, and add the heartier greens to the pan first.


Serves 4 as a light meal or a substantial side dish.

Ingredients
⅓ cup olive oil
4 medium potatoes, boiled
3 medium tomatoes, or comparable quantity of canned whole tomatoes, diced (not canned diced tomatoes): about a pound
6+ cloves of garlic, pressed or finely minced
7+ cups of washed, loosely packed, chopped cooking greens (e.g. collards, kale, mustard greens, dandelion greens, arugula, chard)
½ tsp salt, or to taste
¼ tsp freshly ground pepper, to taste
Pecorino Romano or your favorite hard grating cheese, to taste (optional)

Equipment Needed
Large (14-inch or larger) nonstick skillet (an iron skillet is preferable)
Large pot with a lid
Colander
Cutting board and knife
Garlic press (preferable but not required)
Fine grater for cheese (if using)

Slice the boiled potatoes into half-inch thick rounds. Put the skillet on a medium-high flame and add the olive oil. When the oil is hot, add the potato slices in a single layer. Allow the potatoes to cook, undisturbed, for several minutes until they are lightly browned. Salt and pepper, and turn and redistribute the potatoes as needed to brown and heat the slices.

Add the tomatoes and garlic and stir, allowing the potato slices to break up. Cook for a few minutes, salt and pepper some more, then add the greens, stirring in a large handful at a time and allowing them to wilt slightly to make room for more. Continue to cook and stir until the greens are completely wilted and the dish is not too soupy. Taste for salt and pepper. Serve with a grating of hard cheese, if desired.

Monday, April 30, 2012

Quick braised hearty greens

How to shop for, prepare, and love kale and collards.

Our winter vegetable share has ended, and our summer share has not yet begun to produce. The winter farmer's market, where I was getting some early salad and braising greens, is over and the summer market will not start until next month. I find myself more often at the supermarket and the co-op, choosing from among the imports. Even my potatoes and cabbage are being shipped from California.

Butter paneer masala over rice with a side of kale
There are spring foods, and I'm glad to add them back into my diet: raw milk returns, including the locally made cheese that I make into butter paneer masala.

When the asparagus comes in, I make it every other meal. But mainly, spring is still about living on reserves of starchy vegetables, meat, and grain put by the year before. I think a green vegetable is necessary, too. In winter, we eat more cabbage in the rotation, and in summer, there's more green salad and a lot less cooked greens. In spring, when I run out or asparagus for a minute, it's back to the leafy greens.

I like kale and collards because I can prepare them simply, and use them interchangeably in other dishes or as a simple side. They're the foundation of a breakfast of lightly fried eggs over greens, and go into stew or beside a chop for lunch or dinner. While it's traditional to boil the hell out of them, they don't need to be cooked long to be thoroughly cooked, and they're also good just barely steamed. You can even eat them raw as salad, if you shred them or they're young and tender enough. Some foods we eat year round, and leafy greens are among them.

The dark leafy greens, along with other coles and green vegetables, are deserving of their own food group. The coles include cabbage, kale, and collards, as well as broccoli and Brussels sprouts, and other, non-cole  leafy greens include mustard, calaloo, and dandelion, though these are by no means exhaustive lists.

Oven-baked suet fries and buttered,
grilled asparagus pair with
mustard-brown sugar glazed salmon.
I fall back on a few ways that I will prepare dark green leafy vegetables. This is a practice for braising simple and flavorful greens that go with anything and everything.

How to prepare dark leafy greens:
  1. When you're purchasing collards, especially, make sure the leaves are crisp and fresh, not wilted and sagging. Avoid collards that have many tears or marks on them from insects.
  2. To wash them, fill your sink halfway with cold water and gently swish and rub the leaves in the water. Rub both sides of collards leaves lightly under the water to remove residue: even organically grown greens have soap and dirt on them. (If this seems like too much trouble, consider that organic, ready-to-eat, pre-washed greens are washed with a chlorine bleach solution, and are sometimes recalled for spreading infection instead of destroying them.) Shake them dry.
  3. Inspect the leaves for bad parts to remove: any place that is wilted, brown or black, or otherwise shows evidence of insects having eaten it. Look for the eggs of insects that are sometimes found on the underside (the matte, light green side) of the leaves, and tear out these parts of the leaf.
  4. Cut or tear the thick parts of the stems from the leaves of collards and kale.
  5. Tip: If you're feeling really thrifty, you can chop all but the woodiest stems and start them in a braising liquid, then add the chopped leaves near the end.
  6. Gather the leaves into a roll or pile and slice them. A very thin slice looks elegant and is a nice texture under something delicate like a fried egg. A big, thick slice goes well with something like sausage or potatoes.
  7. Start some fat over medium-high heat in an iron skillet: at least a tablespoon or so or olive oil, butter, or bacon grease. Add a little thinly sliced onion, some red pepper flake. When the onion is lightly browned, add minced garlic or ginger if you like.
  8. Add the greens in large handfuls that nearly fill the pan. Move the greens around, cover if necessary to get the greens to wilt down. Salt what's in the pan, then add more greens. When all of the greens are in, add a liquid: just water is okay, but wine can be nice, and stock is my favorite. You only need enough to steam the greens: about a quarter of a cup will do. Cover and turn the heat down very low. They'll be ready to eat in ten minutes or less.
If you're in a hurry, skip the aromatics and just wilt the greens in some hot fat.

If you're really in a hurry, just steam the greens in stock.

Tuesday, April 10, 2012

Rendering beef fat for perfect French fried potatoes

How to transform a lump of animal fat and some dirty tubers into that crisp divinity, the perfect French fry.

Rendering beef fat is a smelly business. It looks and feels like stinky candles. It takes hours to render any quantity of raw cubed fat, and the odor is unpleasant and weird. But it’s worth it. Once you’ve rendered a bunch of suet, you’ve got a very hard, creamy cooking fat that’s good for all kinds of uses.

When you cook down balsamic vinegar into a syrup, the harsh part aromatizes. It’s in the air. I went to my girlfriend’s house when she was making a reduction, last week, and the wave of vinegar hit me in right the nose as I walked in. But then I ate the balsamic reduction---a little scoop of the gooey stuff on a pear slice had me agog with wonder---and realized that the harsh part was gone. Same with rendering fat. Like the last time I made a big batch of fish stock, I get some criticism for stinking up the joint making these preparations, but zero complaints about the food that results. 

Rendering removes the impurities. The nasty smells cook off, and there will be some chunky stuff left over that you’ll throw away. What you keep is smooth, hard, and a whole lot better for you than shortening or vegetable oil. It’s prized for making flaky pie crusts, crispy batter-fried fish, and the kind of French fries that built a fast food empire

I wrote this week on my other food blog, Tin Foil Toque, about how McDonald’s used to use a mostly-beef fat solution for their famous fries. They still use some kind of animal product to flavor their potatoes, even after switching to vegetable oil for frying, because that is what their fries are supposed to smell and taste like. If you’ve fried fresh potatoes in oil at home, perhaps you were disappointed that the result was not as mouth-watering as what you could get at the drive-through. However, if you make your own fries at home using tallow, you can get the ur-experience that McDonald’s used to deliver, and which has become nearly unknown in its original form: French fried potatoes fried in beef fat. You can still get the modern, industrial version: genetically modified Russet Burbanks coated with “natural flavors” and fried in the oil of genetically modified grass seeds.

Or, if you prefer your food to nourish you instead of kill you, if you are sufficiently motivated, and you have access to high quality fat from pastured cattle, you can make the most perfect fries ever: crisp, not greasy, with lots of umami, and best of all, good for you. 

How to render beef fat:

Start with the best quality fat you can get. Trimmings from roasts and steaks can be saved in the freezer until you have enough to work with, though I usually get it in large lumps of 1-2 lbs, frozen, from the slaughterhouse with my beef order from local farmers. Pastured cattle makes the healthiest fat.

Raw beef fat is thick and waxy.
Use a very sharp knife for handling fat, as it’s slippery and contains tougher tissues within it that offer more resistance.
  1. Trim any visible meat or other tissue and throw it away or save it for stock. Cube the fat into roughly one-inch cubes or, for faster results, mince the fat. 
  2. Roast the fat in a casserole dish, roasting pan, or Dutch oven at 250° F. Open or closed both work, but a closed dish stinks a lot less. 
  3. Stir or shake the pan a few times during the day. If you don’t chop the fat finely, this can take several hours. Even if you do, it can take a couple of hours. 
  4. When you’re no longer making any progress (the stuff that won’t dissolve isn’t getting any smaller), call it quits. 
  5. Strain the fat through cheesecloth into a glass jar. Throw away the solid parts. The rendered fat will keep in your fridge for at least a month. You can also firm it up in any sort of mold, like in ice cube trays or muffin pans, then freeze the molded chunks so you can grab a bit of tallow any time you need a bit of tasty cooking fat. 

Pigging out on ribs and fries

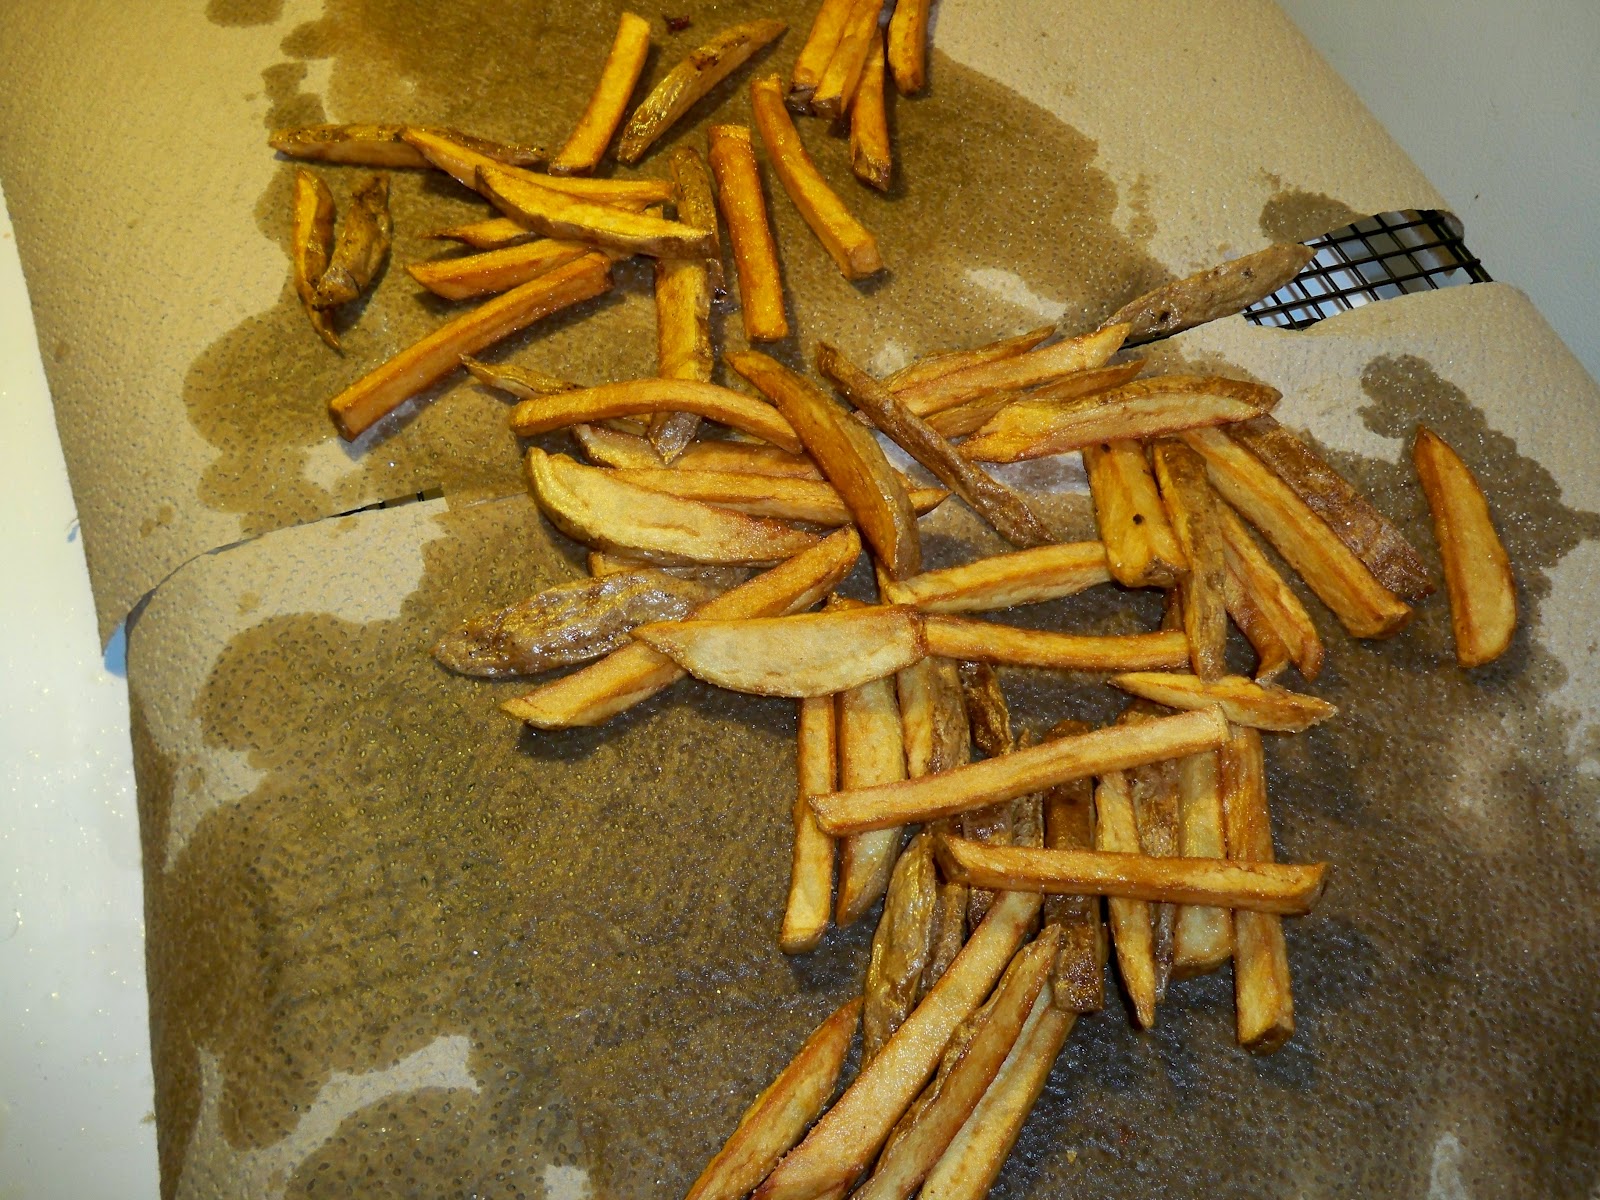
The first thing I did with my freshly rendered tallow was to deep-fry French fries. I admit that I wasn’t entirely sure that tallow would give good results, because I hadn’t cooked with it before. Would my potatoes taste like my house smelled on rendering day? Would they be soggy?

Friends, they were perfect. The reason the potatoes get so crisp is because the fat has so little moisture. Compare the texture of refrigerated beef tallow to butter, and you start to understand what makes that delicious, suet-flavored crispness in fries, but also in other foods I’ve eaten: empanadas are best made with suet, now that I recognize the effect.

I made ribs with the fries, and some cole slaw, and we ate such a pig-out meal, I felt like I was completing a religious rite, it was all so carefully sourced and prepared. This is what I mean when I say that I make comfort food. French fries and pork ribs are supremely familiar, comfortable, and delicious, and yet also a little special. My mother didn’t make these foods; we got them from Chinese take-out and from the fast food drive-through, and later, when I was older, from cheap barbecue joint holes in the wall I found with my friends, and expensive hipster dives in cities, where they fried the potatoes in duck fat.

This is food that I’ve enjoyed most of my life, and for most of that time, it was both mysterious and dirty: bad for me, irreproducible. Now I know how to make pork ribs (I’ll share that recipe with you another time), and how to make fries. I know how to transform a lump of fat and some dirty tubers into the food that has become more American than apple pie. Not only do I know how to make the food, but I know how to make it so that it doesn’t make me feel sick or guilty, or wonder what was in it. I know what distinguishes the pig in my freezer from the one at the closest supermarket, my fries from McD’s. I know which parts are miracle, and which are cheap tricks.

Now, it is medicine food.

Real, good food is better than magic.

How to make French fries:

The secret to crispy fries is twice-frying. Slice your potatoes as thin or thick as you like them. I favor a steak-cut thickness, and keep the skins on. Get your heavy pot of fat nice and hot, and fry a small quantity of potatoes at a time to keep the temperature steady. Fry them once for five minutes, then scoop them out and let them drain on paper towels. Let them sit until you’re almost ready to eat. Then fry the potatoes again in batches, one minute per batch, and drain again on paper towels. Salt them right after they come out of the fat the second time. Serve immediately.

After frying, strain the fat while it’s still fairly warm. Let it cool and put it back in the fridge. Unless you’re frying fish or something else really smelly, you can generally strain and re-use the fat for frying. I use masking tape and a Sharpie to label anything I put in the refrigerator, and in the case of rendered beef fat, I will also note what I’ve fried in it.

Oven fries

Frying takes a lot of fat. And frankly, my husband and I both prefer the taste and texture of roasted root vegetables. Fries can be a fun treat, and sometimes they’re just what I’m craving. But for the most part, I’m much more likely to roast up a pan of sliced potatoes with a hearty dollop of beef fat (which I take right out of the fry-fat jar). It takes longer to bake---about an hour on 350°, turning them every ten minutes---but is less trouble, doesn’t tie up a quart of fat, and tastes just as suet-y and crispy as the deep-fried kind.